
Compass Bezel Overlays
By Charles Scharlau, NZØI
It is common practice to mount a compass to handheld antennas used for Amateur Radio Direction Finding. Having the compass attached to the antenna is extremely convenient for two reasons:
Most compasses have an enumerated bezel indicating the azimuth direction with the numbers increasing in a clockwise direction. The clockwise-increasing numbers are handy for the navigational purposes for which most compasses are used, but they make for some extra mental calculations when determining antenna bearings.
Antenna bearing measurements can be simplified by using a counterclockwise-increasing numbering scheme, sometimes called a "reverse" compass rose by those who are more accustomed to the opposite numbering scheme. When using a reverse compass rose, with the zero-bearing enumeration aligned with the forward direction of the antenna, the north end of the compass needle will always indicate the magnetic bearing of the antenna. Thus there are no calculations required for determining magnetic bearings.
Reverse Compass Rose Graphics
Often the simplest and least expensive way to obtain a counterclockwise-numbered compass is to simply attach an appropriate label over the top of a standard compass' bezel. The labels can be made by printing any of the following graphics files on quality paper, cutting it with scissors or Exacto knife to the appropriate shape, and attaching it to your compass using transparent tape, or glue.
You will need some kind of graphics software program to view and print these files, and you may need to use your graphics software to re-size these images to fit your particular compass. Microsoft Paint (supplied on most new computers) will suffice for the .gif files. I prefer Jasc Software's Paint Shop Pro, which will handle all the files provided below.
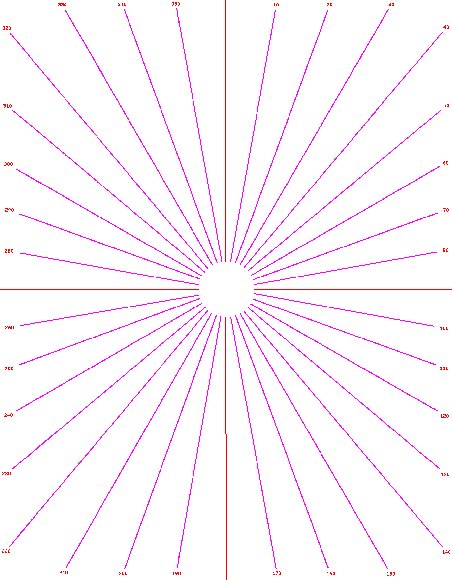
Azimuth Grids
It is helpful to have the azimuth direction lines indicated on your map, since it makes it easy to identify the correct bearing direction on your map. My favorite way of putting a grid of lines on my maps is to print an enumerated set of direction lines on a piece of 8.5 x 11 inch transparency film. The film can then be laid on top of any map. Since it usually isn't known in advance which way the map will be oriented (landscape or portrait) I carry both orientations of grid transparency with me. (The unused transparency can be placed beneath the map.) Files for both orientations are provided below.
