
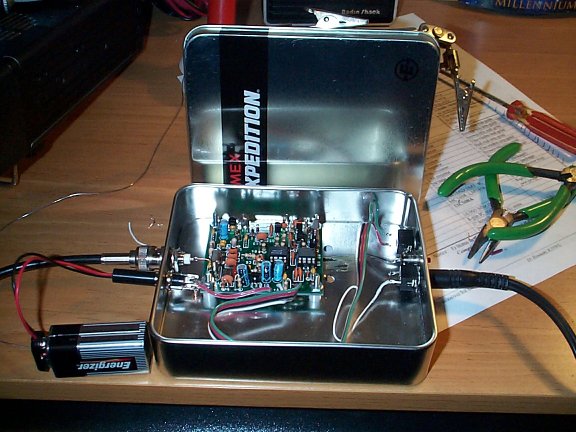
Jan 25, 2003 - Now that the board has been assembled it's time to put the package together. I've chosen a tin that used to house a Timex watch called the Expedition. This is where I get the name Rock-Mite Expedition. The tin measures 5 1/4" x 4 1/4", just the right size to install the radio, power regulator and some batteries. To start I will just install the radio and connections to the outside world. I purchased all my parts from Mouser Electronics. See the supplemental guide for a list of parts.
The hardest part of the whole project so far was drilling the holes in the thin metal. I used standard drill bits and slow speed on a hand drill. The tin bent a little and I messed up one hole a little bit. All in all the final product looks good. Just don't look to close (Picture 4).
The board is mounted with 40-4 x 3/4" Bolts with Nuts and 1/4 Long nylon spacers to mount the board inside the tin. The nuts, bolts and spacers were purchases at Home Depot for $2.09. With everything mounted and wired I was ready to smoke test the unit.
When I plugged in the power I immediately heard the wonderful hiss of the air waves and plenty of code. The receiver portion was working wonderfully. Next I tapped the key "CQ CQ CQ DE KE4QDM KE4QDM KE4QDM K". I tapped and tapped and tapped and NO JOY. Was I getting out. I pulled out the supplemental guide and checked the different points for voltage levels. Everything looked good except the emitter of Q6. The manual said I should be getting ~ 0 Volts with key down. I was getting ~ 3.2 volts. Was this right. I pulled Q6 and plugged it into my transistor tester and the hFE showed 192. Good, Q6 was intact and still working.
My next test was to call a friend to see if he could hear me. He lives about 15 Miles away, so if it was working he should be able to here the radio. Still NO JOY. By this time it was getting late and time for bed. I'd worry about the radio tomorrow (Day 3).