Variant WB4APR Dish and Mount
|
I tried to replicate the WB4APR portable dish for AO-40
and found it much too complex a project as described. In particular, I lack
the skills to assemble projects made out of copper pipe. So instead, I came
up with a substantial simplification that ordinary folks might build. Rather
than using copper pipe, this project uses a small amount of lumber and plastic
pipe. This doesn't attempt to be portable, but it is still transportable
and easy to build. I carry mine around in my Toyota Prius, so it should fit
in most four-seaters if you're not trying to carry passengers in the back
seats.
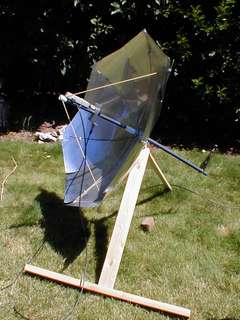
The version here is shown with an AIDC downconverter and a experimental
homebrew dual-band feed. The feed is linear polarization, so there's a
3dB penalty and the dish is under-illuminated with this feed, but there's
still more than enough gain to comfortably copy anyone likely to interest
LEILA at good squint angles.
The mount is not specific to this dish (it could be used on any antenna
which can be mounted on so-called 3/4" pipe) and constructed out of two
2x4's and a 1x2 (with apologies to the much more sensible metric world).
Like the
Arrow 2m/70cm portable antenna (highly recommended for Mode J-FM),
it is designed for hand-tracking (the 'armstrong' method) and
simulations show this performs well when the bird is sufficiently far
away from perigee (that also is, when the squint angle is good).
|
(Click on image for closer view.)
|

|
To use this mount, One starts by orienting the mount so that it points due
towards the equator ('due south' in northern hemisphere) and the elevation
is set for the current maximum elevation of AO-40 for the local latitude.
One can either turn the dish to find the beacon by ear, or one can use a
compass to orient the dish (and not worry about whether one has the right
elevation). Note that to do things by ear, one does need to know roughly
what the beacon frequnecy is, and whether the beacon is active at the time.
So one does need to run a satellite tracking program and/or print out orbit
predictions in advance for a given pass.
So if one knows the beacon frequency with the current doppler correction,
the squint angle is good, and there no obstructions such as buildings or
trees, then one can tune by ear.
|
Start by pointing in the direction of the equator. If the
satellite is close to apogee, then you may hear the beacon immediately.
Otherwise, rotate the dish one direction or another until a signal
appears. Then rotate the dish one direction and then the other until
the beacon starts to fade. The correct orientation should be half
way between those two fade points.
Note that this all assumes you're on level ground, and your dish (or helix)
mounts at 90 degres to the upper 2x4. If not, you may need to raise the 1x2,
or one or both of the legs of the stabilizing 2x4 in order for your antenna
to point accurately.
The mount shown here one was built to be preset for the latitude
of my QTH, but additional holes will be drilled in the 1x2 if I travel
sufficently far enough north. Alternatively, if I travel far enough south
that i run out of adjustment in the 1x2, i can just make a second, longer one
for times when i rove far enough south. Once the mount is properly oriented,
one need only turn the dish on the axis defined by the upper 2x4 and it
will set the elevation automatically within a few degrees at those times
one is likely to be able to hear the satellite well.
The wood is held together with #10 wood screws, and can be disassembled for
transport. The longest board in the mount shown above is the stabilizing
2x4, but if one is operating at a high enough latitude, the 1x2 may turn out
to be longer.
|
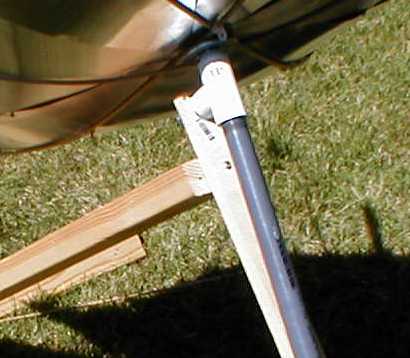
Here's a closer look at the mount. It's just the dark-grey rigid plastic
pipe (known in the 'States as '3/4" Schedule 40 pipe') with a "T"
connection and a 1" hole drilled in the 1x2. Mounting your dish on 3/4"
plastic pipe and drilling a 1" diameter hole may be the hardest part of
this project. The pipe has tapered threads so it fits tightly to itself,
but to secure it to the 1x2, a 2" segment of plastic pipe is used, secured
with '3/4"' electrical conduit locknuts
(see further close-up) for additional
details.
The dish rotates round the top end of the 1x2. With the model shown
here, the locknuts tend to turn with the dish is turned, and to avoid
frequent tightening, it may be necessary use a couple of small wood screws
to prevent the locknuts from turning once they've been tightened.
|
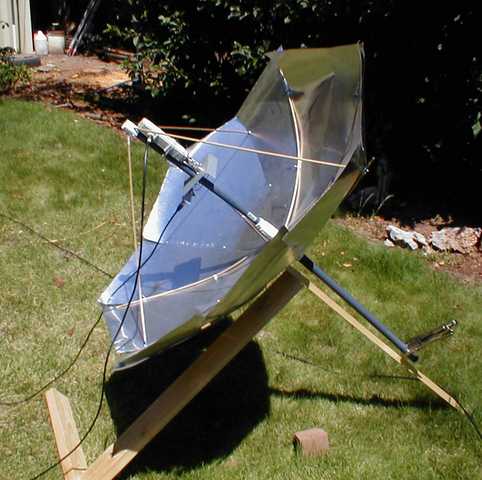
Although not fully shown in this illustration, the long pipe is used to hold
a counter-weight. It should be about as long as the 1x2 with enough weight
on the end to counter-balance the fully-assembled dish and feed. If it
is not present, there will be additional stress on the joint and the dish
may turn on its own, even in the absence of wind. If you look carefully at
the illustration at the top of the page, you will see that "Vise-Grip"
pliers are being used as a counter-weight, as they can be easily position
to nicely balance the weight of the dish.
This is a work-in-progress and construction details sufficient for
replication [not included here] are preliminary and untested. Please
contact me if you are interested in replicating the mount or the dish.
There is one caution about this project. While most of the components
do have the potential for being weatherproofed, the dish itself has
much too high of a wind load to left unattended for a long time, nor
is there a good way of "parking" this dish.
|
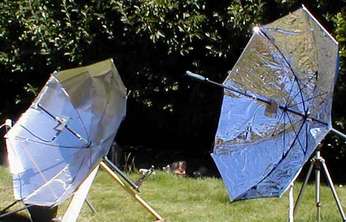
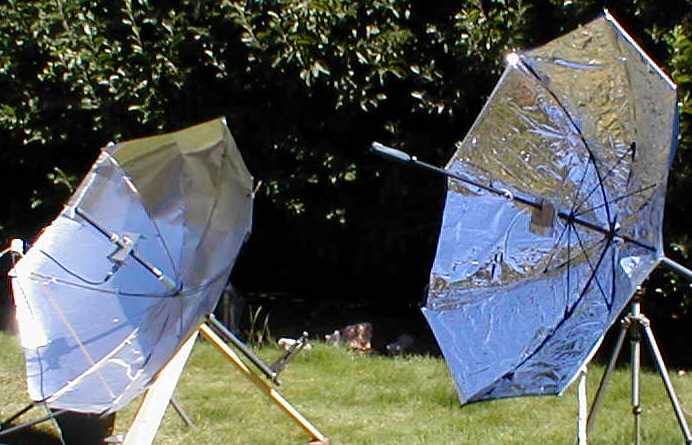
For portable operation, I am currently pursuing a project starting with a
conventional umbrella. It's even more wind sensitive, but it's much easier
to make. It also seems to perform almost as well as my WB4APR variant dish.
When I figure out how to feed this dish properly, I will write it up as well.
If you want to contact me regarding these projects, please write via my
callsign at QSL.NET
-- KD6PAG
|