Build a Saltwater Dummy Load
A great first project for the new ham.
Background
How would you like to make a useful piece of ham radio test equipment
for virtually no cost?
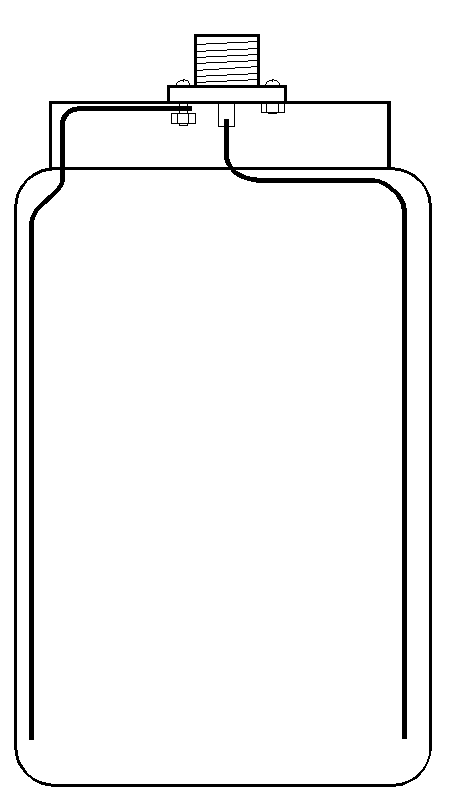
There are numerous plans in books, magazines and on the internet on how to build a dummy load out of noninductive resistors and some fabricated hardware, and maybe with a can of oil to stick it in so it doesn't overheat and burn up. Where is the fledgling ham to find "noninductive" resistors? What if they don't have a workshop or tools to fabricate the metal? Here is a simple solution- the saltwater dummy load. Instead of a physical part or parts to provide the resistance, here we use plain water with a little salt added. The salt allows the water to conduct electricity, so the volume of water in the container becomes the resistive element. All we need is a container to hold the water and a connector to get the RF from the radio into it.
I can't recall where I learned of this first, but I'm sure the idea has been around a long, long time. I built my first saltwater load as a new ham back in the early 1980's. I've built them in containers as small as a baby food jar all the way up to a gallon pickle jar. The size (volume of water) will determine how many watts the load will dissipate before the water gets too hot. I found out the hard way glass jars will shatter if the water gets *too* hot, and plastic jars will get soft. So keep this in mind when sizing the container for your version.
There are some compromises using a dummy load like this. One,
is it's not shielded. For most practical purposes, shielding
isn't
really necessary. Most of the RF will go into heating the water
and
very little will be radiated. Another issue is frequency.
These
loads appear resistive until you go up high enough in frequency to
where
the electrode lengths approach a significant portion of a wavelength,
and
the stray reactance becomes significant. Certainly any
reasonably
sized load will work up to 30 MHz, up to 50MHz is possible if
care
is taken in it's construction.
ALL PHOTOS CLICKABLE FOR
A LARGER VIEW
 |
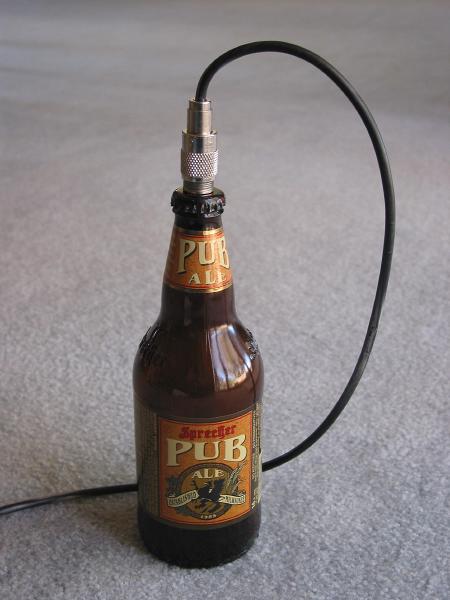 |
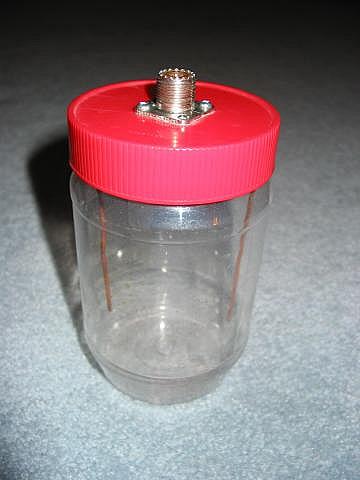
| This is the general idea of what the finished container should look like. | Use your
imagination when
selecting a suitable container! |
To "align" the saltwater load you need a transmitter capable of
generating
a few watts CW at the highest intended frequency of use (say 30MHz for
a load intended for HF), an SWR bridge
and some patch cables. If you have or can borrow an antenna
analyzer
like an MFJ-259 it makes this task a little easier. Fill the
container
up with water. Put the lid on and make an SWR measurement-- it
will measure pretty high. Now, using the tip of a knife as a
spatula, add a tiny amount of salt to the water. Stir it up,
secure the lid
of the container and make
another
SWR measurement- it should be incrementally lower. Keep adding
salt
until the SWR reaches 1:1. You want to "sneak up" on the 1:1
point
without going past it. If you put too much salt in and go past
the 1:1 point you'll have to
dump some of the solution out and add more fresh water. The
actual amount of salt you'll need depends
on how counductive your water is coming out of the tap, but in my load
it worked out to be less than 1/4 teaspoon per pint of water.
That's it!
The saltwater load is now ready to use. Unless your container
leaks or water evaporates out of it, the load's resistance won't change.
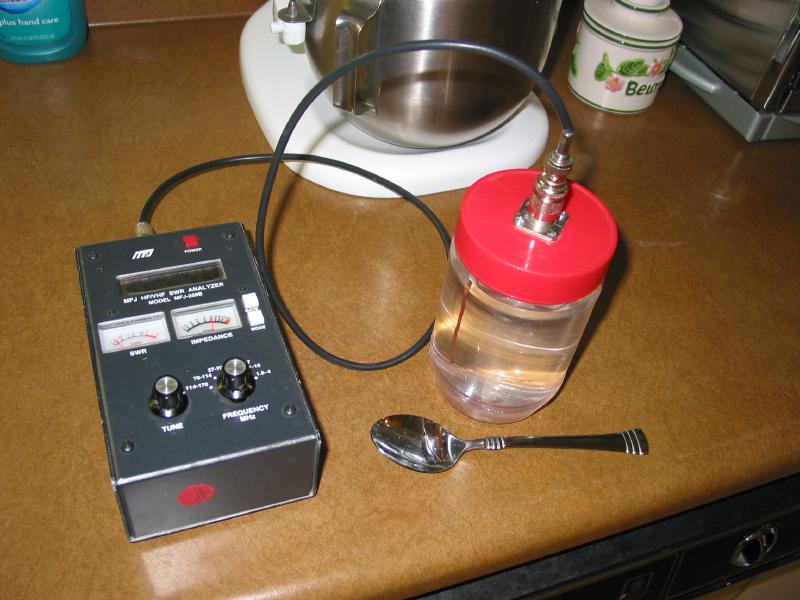 |
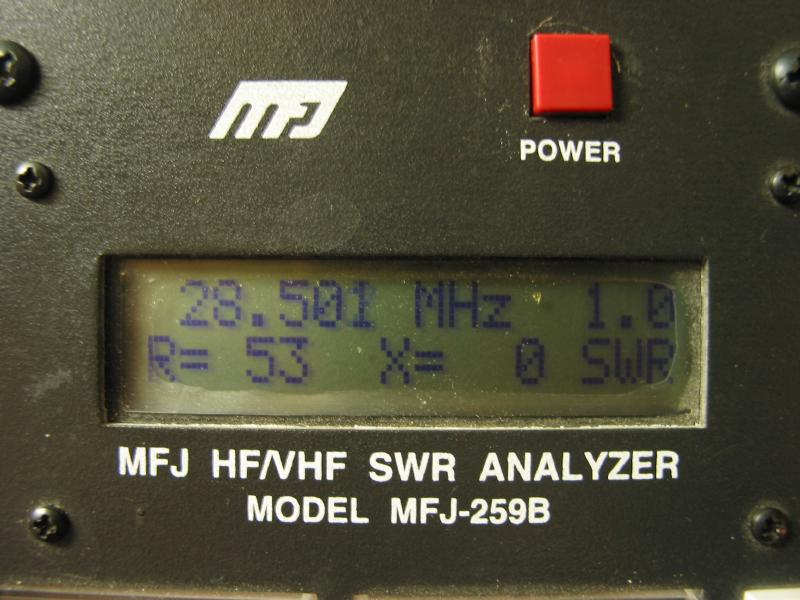 |
| Alignment taking place on the 'bench'. | MFJ-259B Analyzer Display after
Alignment. |
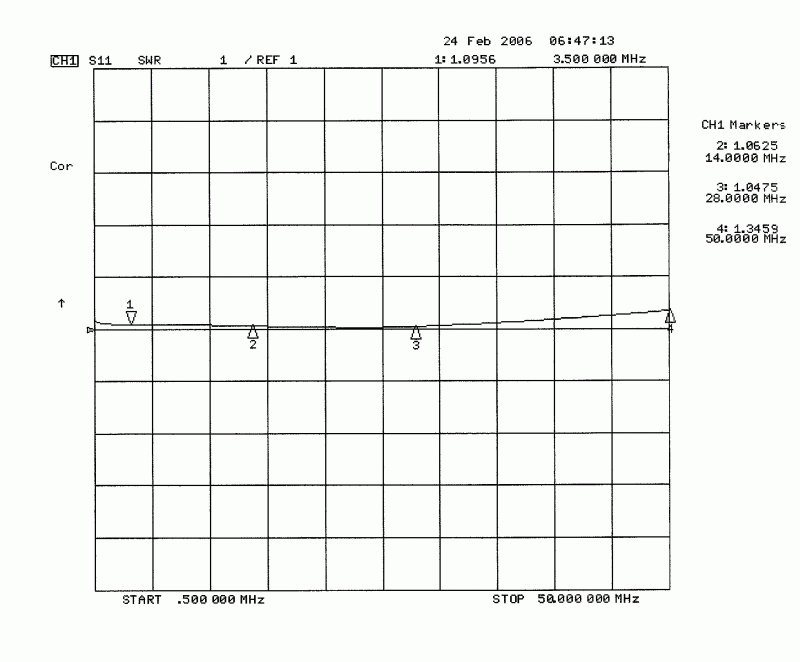 |
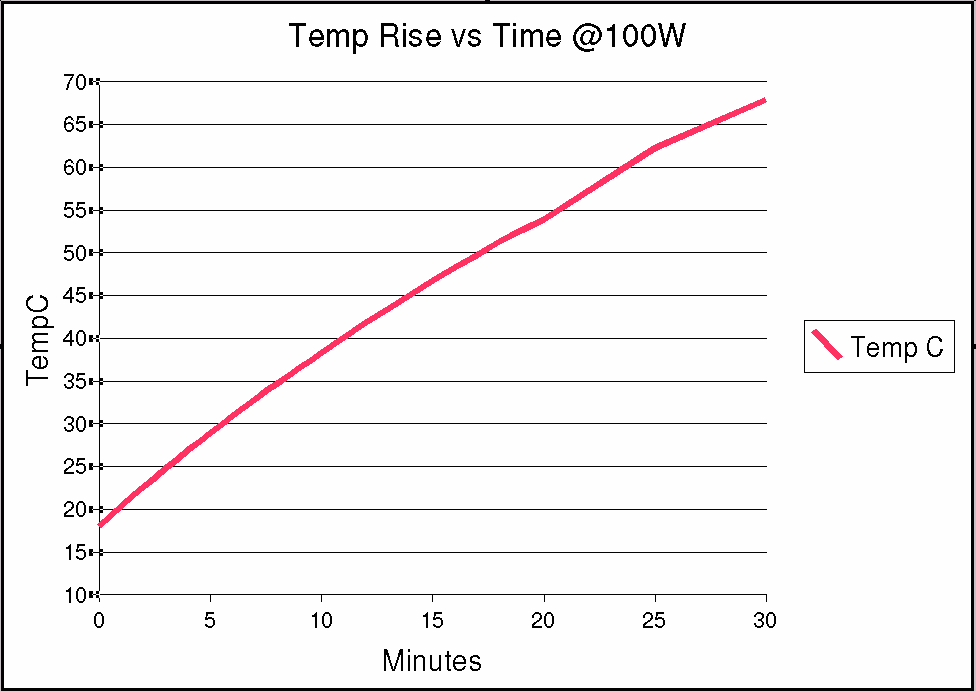 |
| For the skeptics, here is a network anaylzer plot of my sample peanut butter jar load. | Graph showing the temperature
rise with 100W input. Load tested was approx 22 fluid ounces. |
http://hamradio-online.com/2000/apr/w6bky-26.html
http://www.hamradio-online.com/2000/jun/w6bky-27.html
 Back to the Main Project Page |
 Back to the K5LXP Home Page |
© 2006 Pane Relief Computer Services |
|