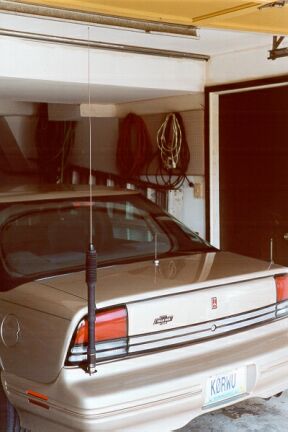
The antenna is small enough to un-screw and place in the trunk for safe keeping, and I can drive into the garage while it is fully extended.
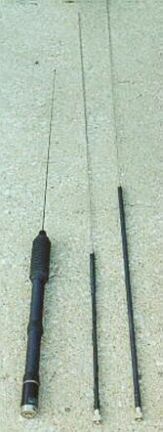
The Yaesu ATAS-1ŘŘ, on the left, even when fully extended is not as long as the loaded 1Ř meter antenna in the center. The 75 meter antenna is on the right, and all three antennas will nicely fit in my trunk.
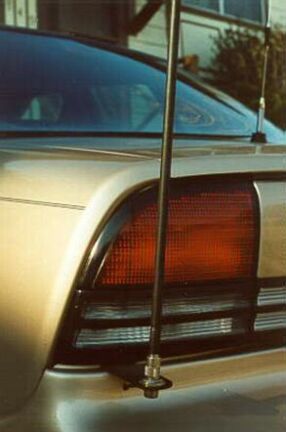
They connect and mount to the car with a simple PL259 fitting. The longer antennas need to be bent for trunk storage, but this doesn't seem to bother them. The upper steel rods can be removed with a single set screw, and then all parts will fit without bending.
The 1Ř meter antenna was my first antenna project, and was used with an auto coupler for the lower frequencies. I had a lot of problems with the tuner/coupler. The worst of which was burning out electrical components in the automobile. I am convinced that you need to keep the feed impedance at 5Ř ohms to prevent damage to the auto wiring.
The 75 meter antenna was built for use when I go mobile at night, and it was another challenge.
The Yaesu antenna seems to work OK on 17 meters, but I thought I might see if a slightly longer antenna, and possibly a better matched one, will make any difference.
I have plans to convert the 1Ř meter antenna to 17 meters. I work the 17 meter band mostly when mobile in the day time. I like 1Ř meters also, but it has it's ups and downs, and is useless during contests.
Note: I built the 17 meter whip, and I can not see a noticeable difference between it and the Yaesu antenna.
The loading coil was limited to 2-1/2 feet in order to do this. I found from experimenting that the 1/2 inch dia. fibreglass rod, needed to be slightly longer to get enough turns to lower the frequency to the 75 meter band.
In order to make up the difference I covered the fibreglass rod with 1/2 inch shrink tubing, and wound the coil, with number 2Ř enamel wire, on top of the shrink, which increased the dia. to 3/4 inch. I don't know how many turns there are, but it fills all 2-1/2 feet, and it tuned in at 3965 khz with a 5 foot stainless steel rod on top.
First, you need to drill a 2 inch deep hole in the end to allow minor rod length changes. On the other end, a offset hole from the center to the side of the rod is needed to connect the feed wire. The lead needs to exit the rod about 1-1/2 to 2 inches from the end.
Solder a piece of number 2Ř enamel wire to the center pin of a PL259, feed the wire into the rod allowing it to side exit and epoxy the rod to the connector, the rod should seat inside the connector nicely, make sure everything is straight, I also filled the rod holes with epoxy, as this area will have the greatest stress when mobile.
A piece of 1/2 inch heatrax #85Ř7 is shrunk over the entire 2-1/2 feet of rod and then the number 18 matching coil wire is soldered to the sleeve of the PL259.
Next, Wind 17 turns tightly between the PL and the center feed wire exiting the rod, and connect. Now, solder the end of a roll of number 2Ř enamel wire to the antenna rod furrow and start winding down the full 2-1/2 feet of rod until you get to the feed wire.
Check the VSWR with the rod in place, then twist and connect for adjustment in minor steps by adding or removing turns untill you get the antenna aligned, then solder the connection.
When completed, cover the 2 and 1/2 foot coil and support tube with another piece of heat shrink for protection. Some like to spray the coil with clear plastic before appling the heat shrink.
The Yaesu antenna can be left on in the rain as it has a protected PL259.
My antenna is very sharp, between 396Ř to 397Ř but it does get me on the band, I may try to modify this antenna to band spread with a small servo. Also, my antenna is out of room for additional coil wire.
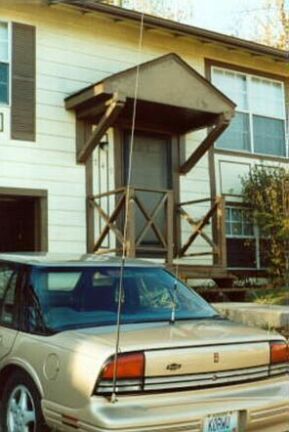
I suggest you add a few inches more to the fibreglass rod length, and If you pull into a garage, maybe you could mount your antenna a little lower than mine is so you can have a 3 foot loading coil.