GO TO HOME PAGE
FEEDING THE DRIVEN ELEMENT
Back
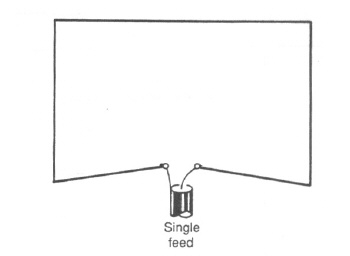
PICTURE A
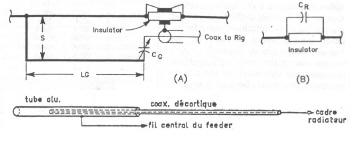
PICTURE B
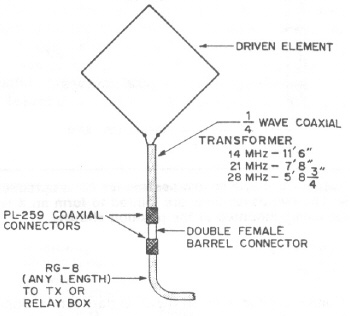
PICTURE C
Back