
GM3WOJ ZL1CT Lattice tower information pages February 2007
GM8GAX Westower renovation story
After a long period away from radio
and with the possibility of early retirement on the horizon my interest was
rekindled and in order to put up some VHF beams I planned to build a 2 section
mast using square steel tubing. However, and due to completely unexpected
circumstances, I overheard a QSO on 2m. Alex GM4EJX, in Larbert wanted to get
rid of his tower. It had not been touched for over ten years - thankfully it was
in its lowered position. With the help of a couple of guys from my work and a
Transit pick-up we dismantled the tower and transported it to my QTH.
As a safety precaution due to the corroded state of the wire ropes, I ran a
climbing rope on 4/1 sheaves in parallel with the winch as we luffed it to the
horizontal. The ground post was of a triangular lattice section and I knew I had
seen this type before. A search through my Rad-Coms confirmed it was a Western
Electronics tower.
The next stage was to assess any damage and work out how to get it back in the
air. Several pulleys were seized (rusted) and two had been worn by the wire
ropes to the extent that they had a 6mm deep groove cut in them. I removed the
steel bushes from the pulleys with the use of a blow torch and replaced the
bushes with stainless steel. I also made two new pulleys from a length of 75mm
dia aluminium bar I just had to have handy. As I planned to use stainless steel
bolts for the pulley pins and running similar metals together should not even be
considered, I used "oilite" bushes in the pulleys. New cables, I
upgraded to 6mm dia for the main lifting and luffing ones, were purchased from
Machine Mart, however they did not stock one long enough for the main raising
cable so I sourced a supplier in Glasgow who not only made it with a spliced
hard eye at one end, it also came with a test certificate and at a competitive
price.
After thinking over the different options for re-using the ground post I decided
to mount it on a base plate. First I made up some feet which would give me back
the height lost through cutting the legs and also spread out the loading from
each tube to the baseplate. This can be seen in the 3rd photo below. Whilst I
can weld two pieces of metal together, I decided to entrust this welding to a
certificated welder. On completion the baseplate and the lower part of the
ground post was painted with primer and several coats of bitumen based paint.
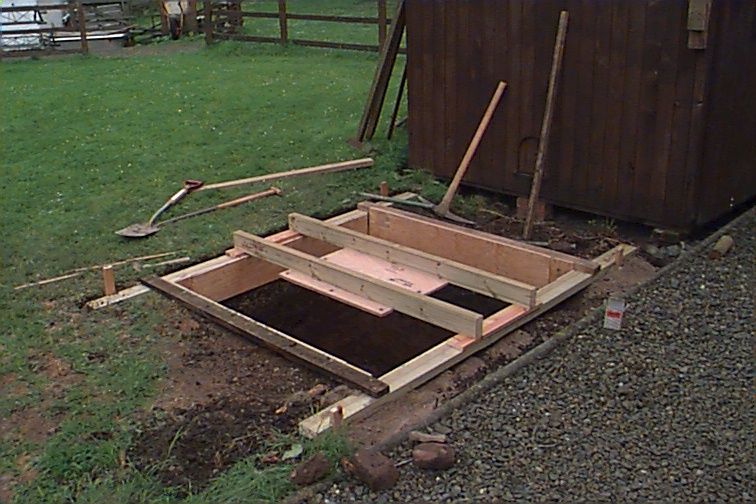
Next the foundation. I decide not to rely on any structural strength that the
sides of the excavation would give but simply calculated the size / mass of a
concrete block that would withstand the turning moment of the tower with typical
antennae at a wind speed of 85mph. Any further resistance given by the sides of
the hole would then add to the safety factor. (In reality I did not want to have
a full analysis of the ground, knowing that some filling has taken place in the
past 30 - 40 years or so). The size of the foundation block is 1.25m x 1.25m x
1.0m deep.
Digging the hole by hand (left photo) was surprisingly easier than anticipated although I did spread the work over three days. The location of the hole would make it difficult to get a ready-mix lorry close so forward to hand mixing. With an eye to the weather forecast a day was chosen, the mixer hired, 30 bags of cement, plus several tons of sand and 20mm gravel delivered. It took seven hours of almost continuous mixing, helped by the XYL, to fill the hole. Unfortunately I have no pictures of this - way too busy.
This next photo shows the jig used to hold the foundation bolts in place, the centre of the plywood was later cut out to make pouring concrete easier.
I used 8 off 20 x 500mm steel
studs. Each stud has a 100 mm square plate at the end and is also located in a
50 mm angle frame. I made the mistake of not leaving enough stud exposed - you
should have at least 2 threads showing above the nut.
Allowing 2 -3 days for the concrete to cure enough to fit the ground post I fitted this and levelled it using a proprietary epoxy concrete mix as a bedding layer for the plate. The nuts were left finger tight. Nothing was done until the concrete had cured for 21 days when the nuts were tightened, using a torque wrench to balance the hold down forces, then the tower was fully assembled and raised (with no antennae and no wind) for the first time. It was a good feeling. After 3 months I checked all the holding down nuts, removing one at a time and using a threadlock compound retightened them with the torque wrench. Then gave everything another 2 coats of bitumen paint.

You will see the chain (left photo)
used to lock the tower in its down position. When I am away I also loop it
around the ground post. I have never had problems with unwelcome visitors but
better safe than sorry.
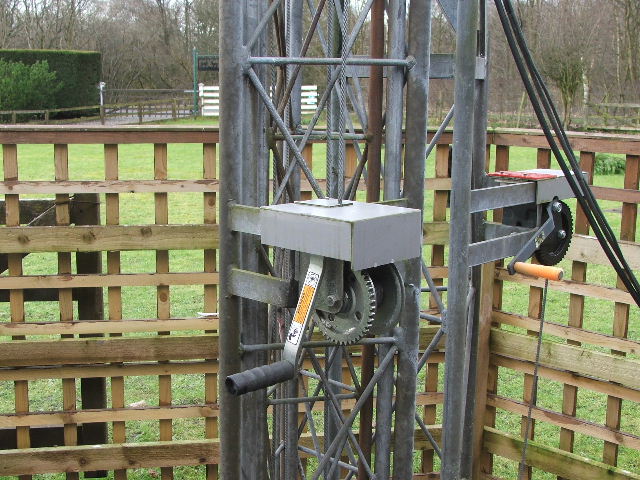 I
wanted to give some weather protection to the winches, whilst they are made to
survive outside I made some simple covers that shield the winch from rain, but
still allow air to circulate (right photo). I would not use plastic bags tied
around the winch as I consider condensation to be more damaging than rain. I
also wanted to protect the internals of the ground-post. The heat in the welding
process will have burnt off the galvanising on the inside of the tubes. I
sprayed the insides with "Waxoyle" using compressed air and an
extension tube fitted to a paraffin sprayer.
I
wanted to give some weather protection to the winches, whilst they are made to
survive outside I made some simple covers that shield the winch from rain, but
still allow air to circulate (right photo). I would not use plastic bags tied
around the winch as I consider condensation to be more damaging than rain. I
also wanted to protect the internals of the ground-post. The heat in the welding
process will have burnt off the galvanising on the inside of the tubes. I
sprayed the insides with "Waxoyle" using compressed air and an
extension tube fitted to a paraffin sprayer.
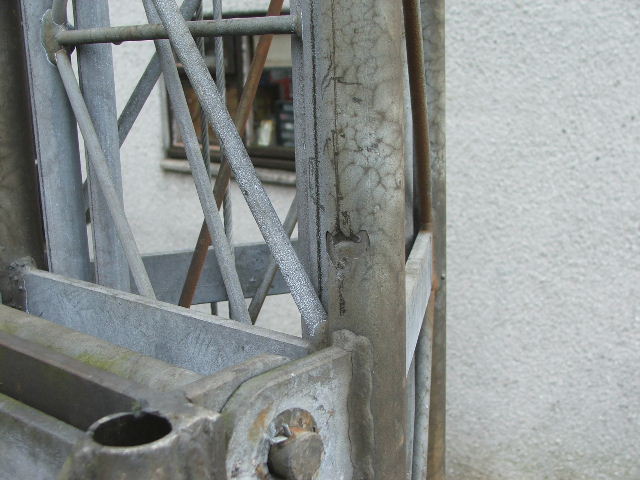
Whilst cleaning up the tower I
noticed a small dent in one leg of the bottom section, it was only when it was
fully assembled that it became obvious how it was caused. When the tower is
luffed, the legs next to the hinge can foul the top of the ground post if
allowed to drop more than a few degrees below horizontal (left photo) - this
will be a weak point to watch.
The tower has been up for 18 months and was well worth the effort. In total it
cost me a small donation to CHAS for the tower, new ropes, pulleys, bolts etc.
The foundations and, in order to make the area tidy to the satisfaction of the
"boss" some gravel, fencing posts and trellis.
In refurbishing this tower I used
standard boat trailer winches. I can live with the luffing winch but I will
change the raising winch to one with a higher ratio and braked. The lower part
of the top section is showing a film of rust over the galvanising and will need
cleaning and treating over the summer.
Feel free to use any part of or pictures this on your web site and also thanks
to Gavin GM0GAV for the Western Electronics brochure. I now know the model and
the loading of this tower, which gives me some comfort.
G3GIQ's web site has some good pictures of his two tower failures - well worth a
look --
http://www.qsl.net/g3giq/G3GIQ-antennas.htm
73 and thanks for the web page, it is most informative and credit to you for the
effort.
Peter GM8GAX
February 2007