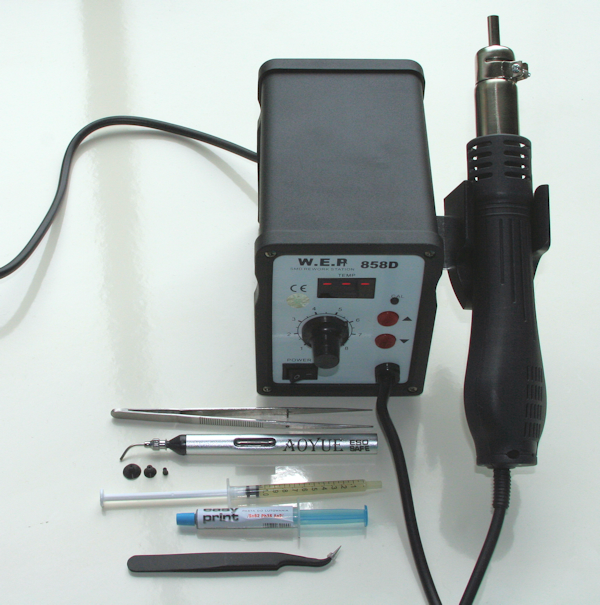
Building or repairing SMD boards can be tricky if you haven't the proper tools for the job. Having tried holding down components using a weighted bent piece of wire and an ordinary soldering iron, I can report that it's not only hard work but often results in poorly placed and sometimes lost parts. Removing SMD parts without the proper tools can be equally difficult. Shown above are anti-magnetic tweezers (the curved black ones), Easy Print solder paste, flux and SMD pick up tool. The pick up tool has proven to be useless at picking up small parts and is no longer used.
Below is Multicore solder paste and a selection of dispensing needles. 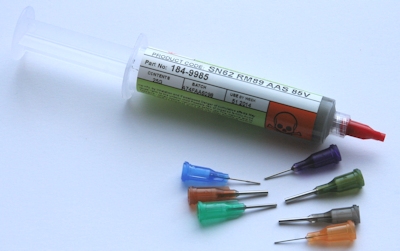
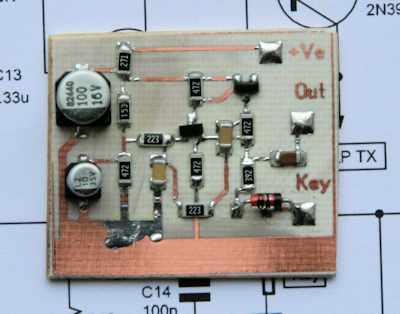
I print and etch my own boards, I did consider including details on here, however there are many well written pages on the internet describing how to make your own PCBs. Basically the method is very simple: Print a mirror image of the tracks onto glossy paper with a laser printer, then transfer the toner to the copper board with heat. Finally etching the exposed copper in ferric chloride or similar PCB etchant. I use a cheap Samsung M2020 laser printer, Chinese transfer paper (the yellow stuff from eBay, £11.99 for 100 sheets, inc delivery from a UK address, Aug 2014 prices) and an ordinary clothes iron. Glossy "inkjet" photo paper works fairly well with a laser printer, although it tends to leave some paper residue which needs careful rubbing off with the edge of your thumb and plenty of water.
There has been a flood of cheap Chinese hot air soldering stations on both Amazon and eBay. The 858D unit shown in the first image is one of the cheapest, costing less than £40 delivered (August 2014 price, from a UK importer on eBay), yet it performs well enough considering the price. The temperature is set using the red buttons while the hand unit is sitting on the cradle, the typical soldering temperature for most SMD components is 200 ~ 240 degrees C. Lifting the hand unit off the cradle starts the fan and heater, with a temperature of 230 degrees being reached in around 10 seconds. Placing the unit back on the cradle turns off the heater with the fan running until the temperature drops below 100 degrees. The rotary control adjusts the fan speed.
There have been reports of incorrectly wired mains earth connections with these units, mine was wired correctly and came with a UK style mains plug. If you buy one, it only takes a few minutes to open the case to check the wiring.
Low cost solder paste, such as the "Easy Print" shown in the first image, is not as easy to use as the label suggests. The syringe often jammed and the solder paste didn't seem well mixed producing some blobs of paste with little solder content. There is a relatively short shelf life for solder paste if it's stored at room temperature, the Easy Print didn't show a date, which is suspicious and may explain the poor performance. I now use Multicore solder paste, which can be obtained from RS Components in the UK. Unless you are planning to do a lot of soldering, the cheap stuff is probably OK although you may find it frustrating to use. Either type of solder paste will also require needles to accurately place small blobs of solder paste onto the print board. An assortment of these blunt ended needles can be obtained cheaply on eBay, in early August 2014 a pack of 50, and three empty syringes, were £2.49 delivered. The empty syringes are of little use.
After soldering I clean the boards with Kontakt U, although there are plenty of other flux cleaning products.
Not shown is a print board holder. For my small boards I use a machine vice. It's important to secure your board well and keep it horizontal. Do not screw up the vice too tightly as small size boards will deform when heated -which ruins the board.
Also not shown is a magnifier, I use a cheap version of an Optivisor which is adequate. The ideal item would be a binocular magnifier mounted on a stand, but for home/hobby use it's a little extravagant.
Surface mount ICs, transistors, small value capacitors and resistors are quite robust with regard to heat, however if you choose to use SMD electrolytic capacitors beware they are less tolerant of high temperatures. Checking a few data sheets suggests a maximum temperature for SMD electrolytic capacitors of 260 degrees C for just a few seconds, with some types having a maximum of 240 degrees. In addition, the number of times these capacitors can be heated to their max temperature is twice.
Professional work on multi-layer boards is best done with an under board heater to pre-heat the board before working on the top side, however for my home building purposes the simple hot air soldering station is perfectly adequate. For those with very deep pockets there are plenty of elaborate SMD soldering accessories, one hot air pencil from Zephyrtronics (www.zeph.com) will set you back $899 plus shipping and tax. Their "Air bath" board heaters cost from $329 to $6,985...
Removing SMD parts with a hot air station is child's play, just heat the part with the hot air tool and lift it with tweezers, take care to heat shield any nearby sensitive components such as electrolytic capacitors and plastic connectors. Re-fitting parts, or building a board from scratch is almost as easy.
Fitting SMD parts to a board is straightforward, the steps are:
1. Clean the board
2. Place on one side any parts that are going to be hand soldered afterwards, such as coils, electrolytic capacitors, connectors etc.
3. Fix the board securely in place horizontally
4. Dab a small amount of solder paste onto each board pad, if it's a large board consider assembling a smaller area first.
5. Remove the SMD parts from their packaging and place them on the pads, the solder paste should hold them temporarily in position
6. Set the temperature on your hot air soldering station, lift the hand piece, when at temperature heat the components from above. The smaller parts will "snap" into place on the pads when the solder melts.
7. Hand solder any non SMD parts.
Carefully check all the soldered joints for a nice "fillet" of solder between the component and the pad. If you need to add solder, it can be easier to use a small (12 Watt or so) fine tipped iron to solder the odd suspect joint. Some solder stations are equipped with an ordinary iron for that purpose.
Clean the flux residue with flux cleaner and an old tooth brush. Once the board has been tested, I spray it with a thin coat of PCB lacquer (Maplin part number N67AN).
There are some good YouTube videos showing surface mount work, beware of those showing soldering with an ordinary iron and those who use a hot air paint stripping gun. The EEV Blog and Zephyrtronics videos are good, although Dave on the EEV Blog does use excessive heat (400 deg C to remove an IC) and flicks removed components from the board with a screwdriver, not to be recommended. I find that using a higher rate of air flow, and a lower temperature, than the EEV guy works well and appears to melt solder quicker, with less risk of component damage.
Zephyrtronics work to the exacting standards of the space industry. Links below:
EEVblog #167 - 858D hot air rework station review
Zephyrtronics Using solder paste at the bench


|
