- COM80 does not show up
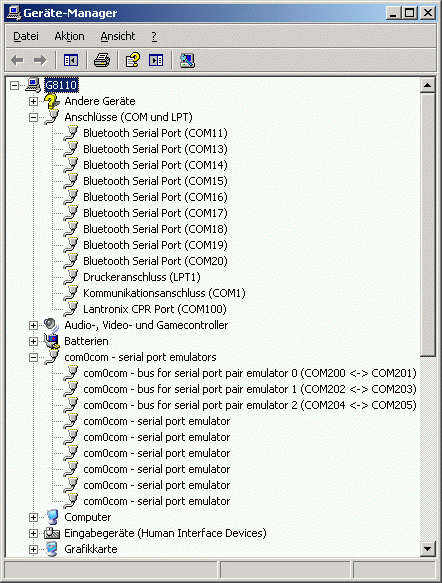
- COM80 shows up and is the port to be used for the GUI soft
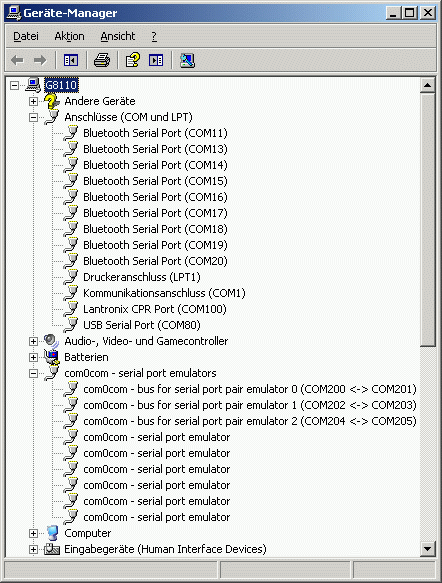
Device
Manager before the Mode-S Beast became connected
 |
Device
Manager after the Mode-S Beast became connected
 |
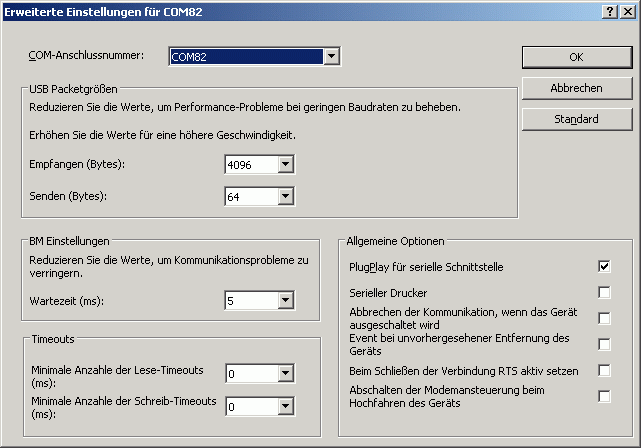
In the device manager, in case that you live in a high traffic area,
you might want to adapt the enhanced parameters of the USB serial
device a little bit.
Remember that this makes only
sense if you have a fast computer, on lower speed ones (below 1GHz) the
polling interval should be set to a higher value, up to 100ms or so.
Just test it.
IMPORTANT: You have to unplug and re-plug the Mode-S Beast after applying these changes in order to get them actually set.
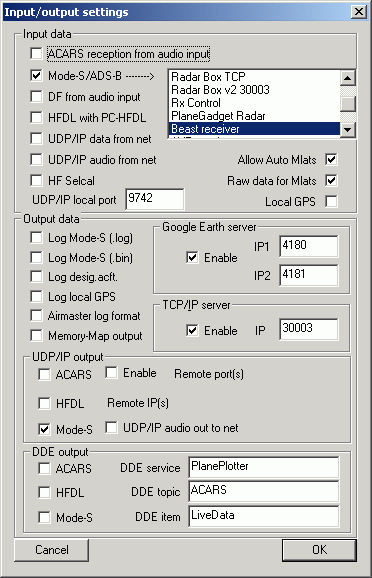
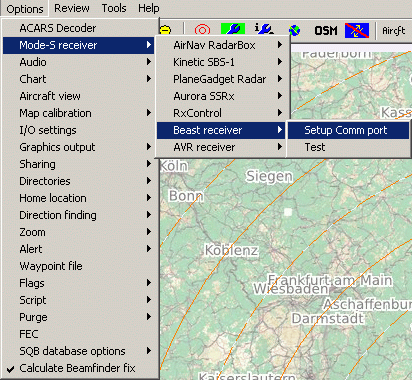
Step 2: Options -> Mode-S receiver -> Beast receiver
-> Setup Comm
port -> Comm port (your COM port) and Comms port data rate
1000000 (after V1.21 3000000)
-> OK
|
|
NOTE: With Firmware equal or later than V1.21, the 1MBit has been changed to 3MBit, so you have to enter 3000000 in Comms port data rate |
It happens quite often that beginners set up their map incorrectly. Remember that you do not need to calibrate maps, just zooming into the default world map and then pressing the button "OSM" for a new download of Open Street Map is totally sufficient. The only thing that I have to ask COAA is how to reset to this world map in case of misconfiguration, because the only way I know currently is to remove and re-install Planeplotter completely.
Important Note: Whenever you get a "No RAW data" error message, especially when testing MLAT, you simply need to turn MLAT time stamp on. Planeplotter's error message is a little bit misleading here.
Making Screenshots and comparison of the performance:
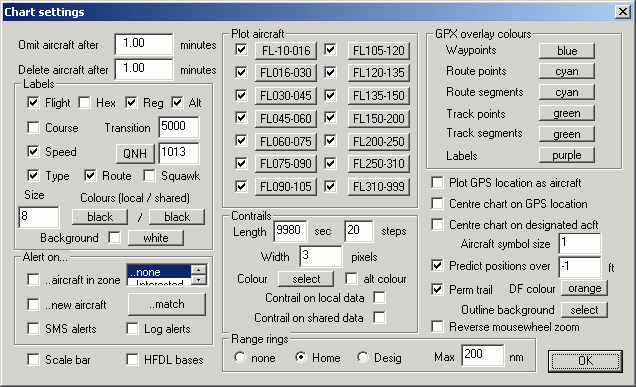
Quite often users of the Mode-S beast make screenshots of Planeplotter's results. Please, when doing so, be aware that there is a long term integration done in Planeplotter, which is by default 5 minutes. This is a little bit unfair, the Mode-S beast does not need such. Instead, lower down the integration to 1 min. Go into the menu "Chart Settings", and enter 1.00 into "Omit aircraft after..." and "Delete Aircraft after...". Maybe you even switch of the prediction completly by unchecking the box at "Predict positions over...".
My own chart settings are like this:
Planeplotter Performance:
Recently there was a summary about Planeplotter performance tweaks.
FAQ:
Q: I do not see the aircraft type in Planeplotter
A: The aircraft type is not part of the Mode-S transmissions, but
Planeplotter is able to read the type from a database, which you can
find here on the manTMA pages. Decompress the database and load it into Planeplotter with Options->Directories->SQB Database