Welcome to DJ 0 MY ' s - K1 (#1484) Page !
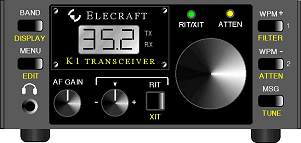
Elecraft K-1, Multiband QRP TRX:
Once again surfing through QRP pages on the internet I was atracted by the K1 QRP transceiver kit sold by Elecraft in USA. By the end of 2002 the US Dollar was becoming weaker and weaker agianst the Euro and due to the exchange rate getting better and better I immediately ordered the kit in USA when the exchange rate reached 1.05 USD per EUR. ;-)
There was also the option to purchase the K1 directly from the
german distributor www.qrpproject.de,
but due to the exchange rate thing explined above it became quite attractive
to import the K1 directly from the US. Here my personal sample calculation for
the total costs of the direct importation:
Sample Calculation - Direct Import:
| K1-4 Kit: | 349.00 USD |
| Shipping: | 26.29 USD |
| Total in EUR (incl. 1% Credit Card surcharge for foreign currency payment): | 361.96 EUR |
| + German 16% VAT (no import customs duty on radio kits - there is only the VAT to pay....) | 57.91 EUR |
| + Parcel Service - customs clearance charge | 17.00 EUR |
| Total Cost of Direct K-1 Importation: | 436.87 EUR |
After I ordered the K1 in the USA I've put my two previously owned QRP transceivers for sale on e-bay. One was a MFJ-9040 and the other one a Smallwonderlabs SW-20+. Both radios were sold at arround 100 EUR each. So in total I had 200 EUR additional "pocket-money" available to subsidize the total payable costs of the K-1 and keep the XYL happy ;-) (after having the K-1 ready I wouldn't need the other to radios anyway....)
After about 8 days the parcel arrived here in my QTH. This is how the parcel
looked like:
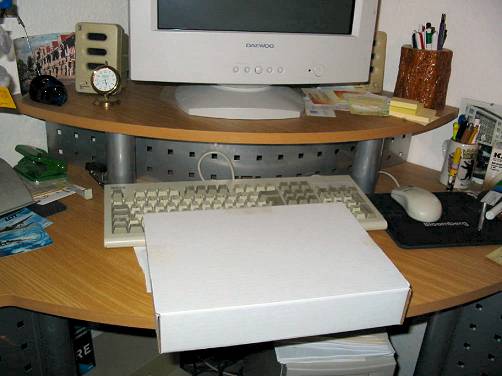
The box came very well secured and shock protected against any damages wich
might occur during transportation.
This is how the box looks like on "first open" after taking the owners
manual out of the box:
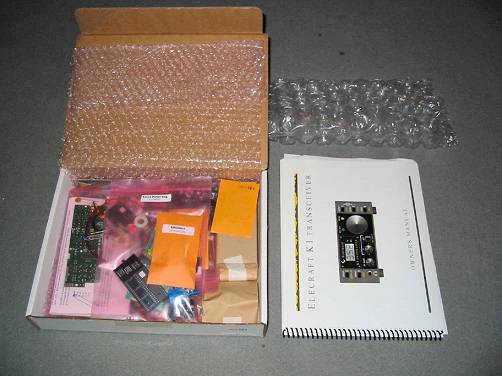
My K1-4 has the serial number 1484 - as can be also seen here on the
outside of the box:

Taking out the contents and preparing for sorting them and to do the first
parts inventory:
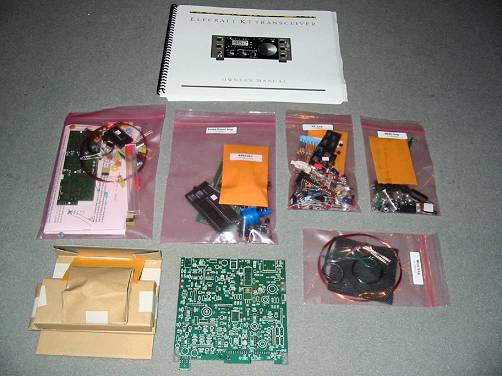
On the top you see the owners manual. Next row the 4-Band filter board bag,
the front panel board bag,
The RF board parts bag, the hardware bag. Bottom row: the front panel, speaker
and housing parts, the
RF main board and the wire bag.
OK, now it was time to start to build the kit. My experience with QRP kits so far was a little bit limited, but was sufficient to build the K1. In the past I have build some kits like the Smallwonderlabs SW-20+ (my first project where I had to wind toroids) or the Rockmite. I also built the Emtech ZM-2 antenna tuner (my second kit requiring to wind toroids). I built this kits in the last two years before, so I had some building and kit experience and also some basic toroid experience (including winding monofilar & bi- trifilar toroids and toroids with several taps). I am a licenced ham since 1985, but since 2001 I was never "brave enough" to build a radio myself. That means that in the past my soldering experience was only limited to some computer interfaces (packet radio, fax, sstv, rtty, etc.) and preparing some adaptor cables or building a ARDF RX.......so basically only simpler projects in my previous "home made" career....
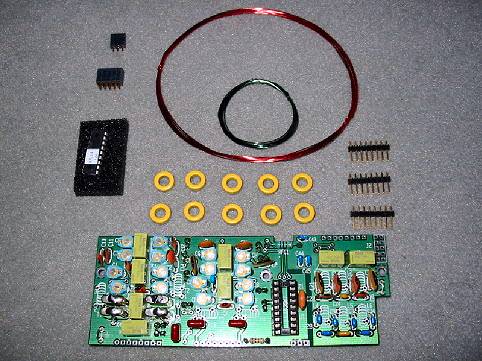
After Inventoring all the parts (all was 100% present, even 1 varicap diode
and a resistor too much, hi hi !!!) I heated up the soldering iron and started
with the building of the 4-band filter board. Here the filter board is almost
finished. Only a few connectors, the I/O controller and the toroids are missing:
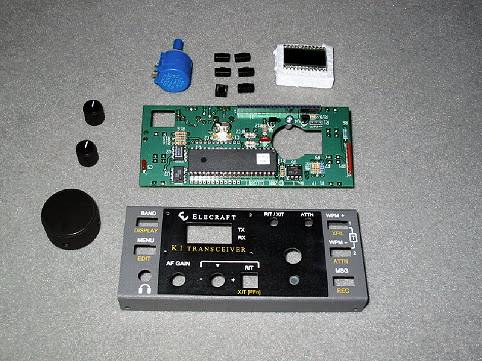
After finishing the filter board the builder will usually start with the front
panel board assembly (this is if you build it in the order given in the K1 owners
manual). Here you see the almost completed front panel board - only the LCD
and 10-turn potentiometer installation is missing. You see also the key caps
and knobs as well as the front panel itself:
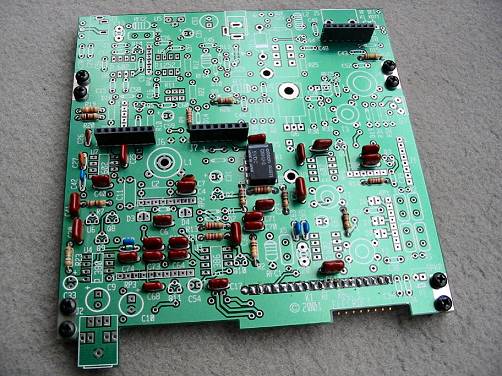
After completing the Front Panel assembly it was time to start with the RF
main board. Here you can see the board partially assembled:
I logged all the building times as precisely as possible (+/- 5 min.). The assembly took place during 2 weeks time. Every weekday evening I spent between 30 min. an 1 1/2 hours building (I didn't want to have my XYL complain). On the weekends I spent some more time on it, but splitting it for example 30 min. in the morning, 1 hour before lunch 2 hours in the evening, etc.
Here is my building times log:
| Building stage: | Time needed: |
| Parts Inventory | 1:55 |
| 4-Band Filter Board (40, 30, 20, 15 m band) | 5:20 |
| Front Panel Board | 3:00 |
| RF Main Board | 10:25 |
| Alignment - RX | 1:30 |
| Alignment - TX | 0:30 |
| Hardware / Mechanical work | 0:20 |
| Total building time: | 23:00 |
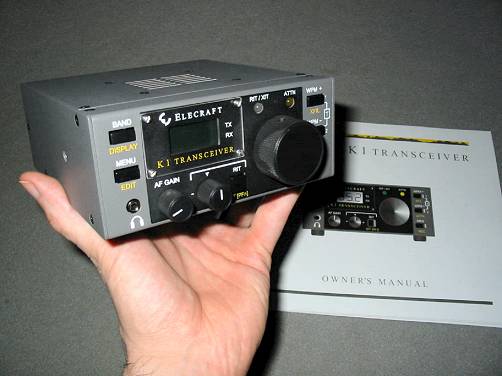
And Voilá......this is how the radio looked like after the 23 hours
of total building time in the background you see the excellent K1 owners manual.
If you are interested in more details about the K1 you can also download the
owners manual from the Elecraft
Website:
The first hours I spent only listening and evaluating the excellent receiver of the K1 (but it was at a later point where I really found out its strenghts). Then it was time to make the first QSO with the new K1. I set the power output via the LCD display to 4 Watts and used my ZM-2 tuner to tune the raingutter of the house where I live. I was very interested in QRP operation on 30m since this was told to be a great QRP band. So my first call was to T99C and we had a quick contest like QSO. Great - the first contact was made !!!
Now the DX attempt. I though that during the ARRL CW contest it should be a good opportunity to work some North American DX with the K1 (although only quick contest type of "QSOs"). The first contact was on saturday morning local time on 14 MHz with K1TO in Florida. During saturday afternoon/ early evening I managed 5 more QSOs with US stations but this time on 21MHz - stations such as KV1A, K3ZO, N4RV, K2UA, KC1XX, W4KZ - these where spread over the whole East Coast in the states of Georgia, Virginia, Maryland, New York, New Hampshire. On Sunday evening I tried a few QSOs on 14 MHz with the eastcoast, but was not successful and I only earned some "?"'. But then after QSY I managed to have a QSO with VE1JF in Nova Scotia. This was all done with K1 set to 5 Watts and again with m tuned raingutter "stealth antenna". The big strenght of the K1 came out during the hard contest conditions. The switchable filter bandwiths are really great and I found myself comfortable most of the times with the 400 Hz bandwith setting. Only very seldom I had to go down to the narrow 200 Hz setting, when nearby stations where causing QRM.
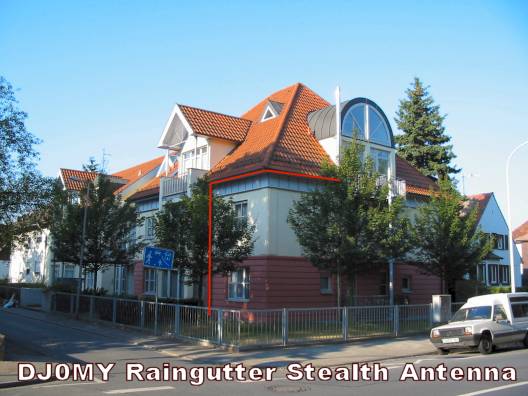
Here you see a picture of my incredible raingutter antenna. The vertical part
is about 6 m (approx. 18 ft) tall and the horizontal part about 7m (21 ft).
(the red line in the photo shows the HF active part of the raingutter). The
feeding point is insulated against ground with a piece of ceramic tube leading
into the soil. I use about 2 m (6 ft) of wire from the bottom of the vertical
raingutter tube through the window into the living room directly into the ZM-2
tuner which stands near by the window. This is a real invisible antenna and
even if this might not appear an effective radiatior it works quite acceptable
for me (it's a reted flat and I am not allowed to set-up antennas, so I had
to invent something):
My final comment: this K1 is a great little radio packet full of nice functions and gadgets and I think I will have a lot of fun with it in the future. Since I am travelling on business trips quite frequently I hope that the K1 will be my future companion on most of my trips to have some nice hotel room QSOs in the evenings.
The end of the story is that even my XYL says that it is a "cute tiny radio"...... ;-)
This is the end of my tiny K1 story. I hope you enjoyed it........ ;-)
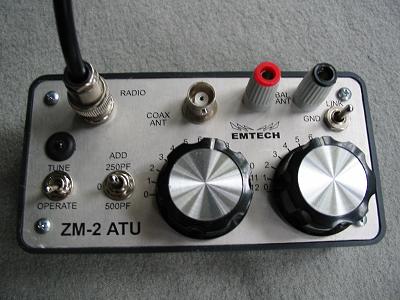
Two Antenna Tuners that I've built and I am planning to use with the K1:
The ZM-2 antenna tuner kit (Z-Match) - very easy and fast to tune (no switchable inductor !).....tunes almost every wet rope, hi !:
The multiband Fuchs-Circuit (source www.qrpproject.de)
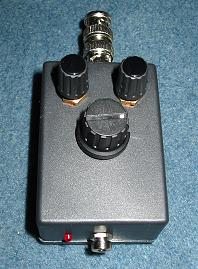
The Fuchs circuit is used with a half wave piece of wire. The advantage of the "Fuchs Antenna" is that you don't need any radials or HF counterpoise to have an effective radiator. The advntage of the "multiband" Fuchs circuit is that you can operate the walf wave wire not only on it's basic frequency but also on it's harmonics. The halfwave wire will have a gain like a half wave dipole on the basic frequency, but will have some small gain if operatd at the harmonics. For example a 21m long wire can be used on 40m, 20m, 15m and 10m. (on 20m, 15m and 10m with some gain) or 41m wire lenght for 80/40/30/20/17/15/10m band operation, etc. - I never tested this antenna with the K1 but when the weather becomes warmer (outdoor operation) I will certainly give it a try.
This page will be always "under construction" :-)
![]()
Best 73 / 72 de Oscar, DJ 0 MY !