![]()
![]()
![]()
![]()
![]()
English - Hrvatski
Digital retro clock with Nixie tubes
At early 2003 I've seen an old analytical instrument with displays made with Nixie tubes. It was a love at first sight -with cool red glow, so unique to Nixies.
Recently I came across the great site by Mike Harrison, where he described his project, digital clock with Nixie tubes. With a few 40XX CMOS ICs and a handful of components, in just two afternoons, this unusual clock is finished.
As Nixies were produced in '60s and '70s, they became rare and obsolete. Some collectible unusual ones are being sold for a good price.
Big thanks to Nikola 9A2FW, who kept these NOS tubes in his drawer for last 30 years and pass them for free!
 Back view
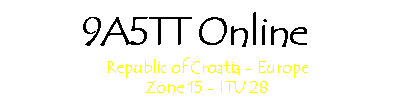
to Nixie tube 5853S. Made by ITT, week 4, 1972.
Back view
to Nixie tube 5853S. Made by ITT, week 4, 1972.
 Front and
side view. Very fragile construction (anode-grid and 10 cathodes shaped
as individual numbers, stacked behind each other).
Front and
side view. Very fragile construction (anode-grid and 10 cathodes shaped
as individual numbers, stacked behind each other).
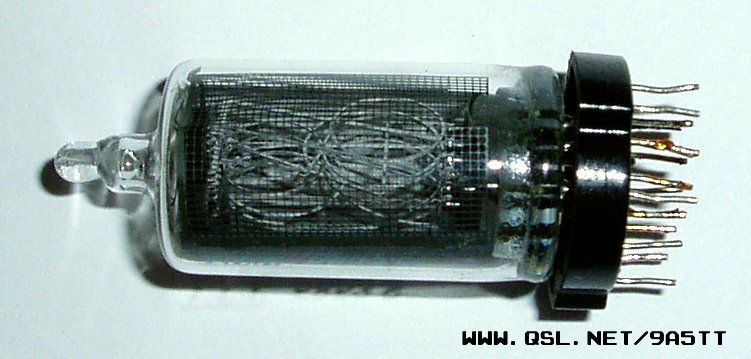
 Another
side view.
Another
side view.
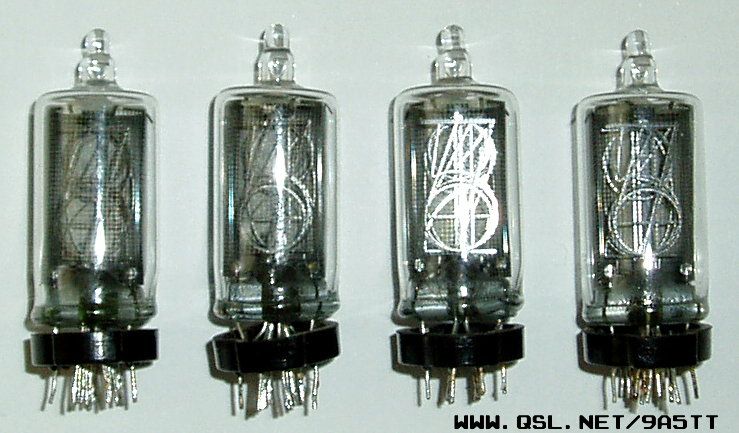
 All four tubes.
At rightmost tube, both LH and RH decimal points are visible (not used
for this project).
All four tubes.
At rightmost tube, both LH and RH decimal points are visible (not used
for this project).
 Another photo
with individual "numbers" clearly visible.
Another photo
with individual "numbers" clearly visible.
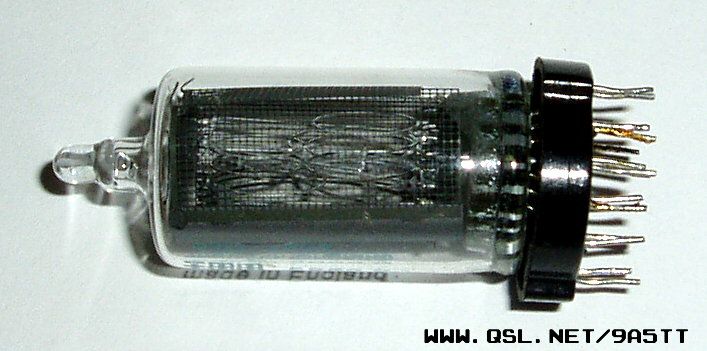
 Anode (grid)
and cathodes, completely visible.
Anode (grid)
and cathodes, completely visible.
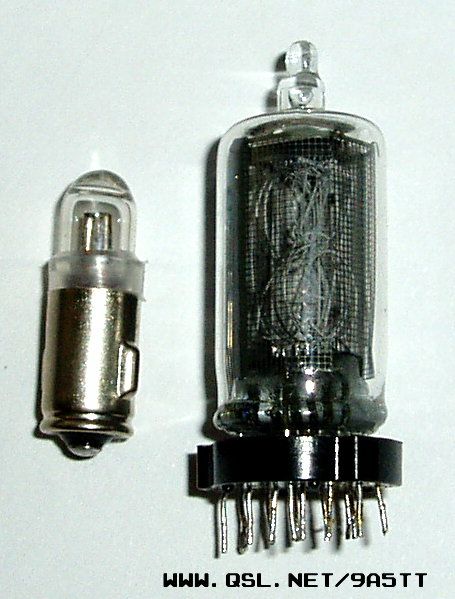 Neon lamp
(left), being used for seconds indicator. Glass bulb is about to be removed
from assembly. Number (segment) is only 12.5mm high and nice shaped.
Neon lamp
(left), being used for seconds indicator. Glass bulb is about to be removed
from assembly. Number (segment) is only 12.5mm high and nice shaped.
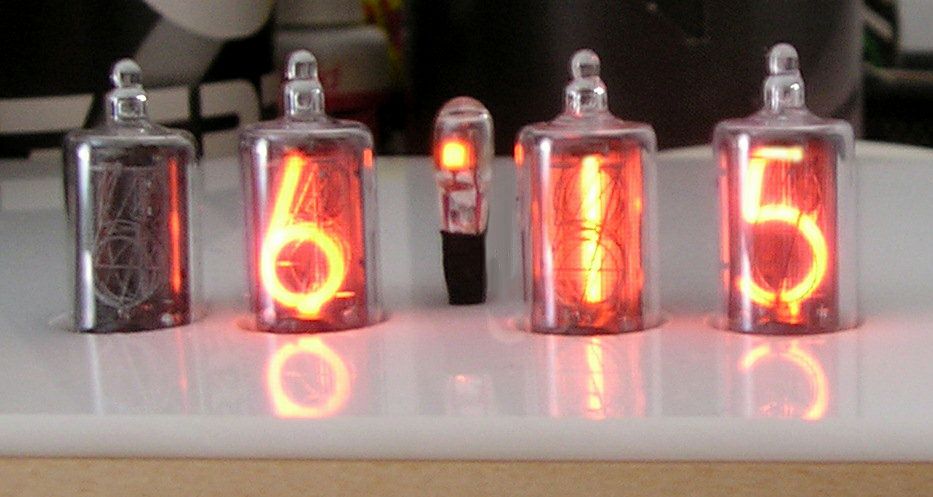 My clock worked
from first try! This is first version, with neon bulb placed vertically.
I didn't like the look, so I added second one and fixed them horizontally.
My clock worked
from first try! This is first version, with neon bulb placed vertically.
I didn't like the look, so I added second one and fixed them horizontally.
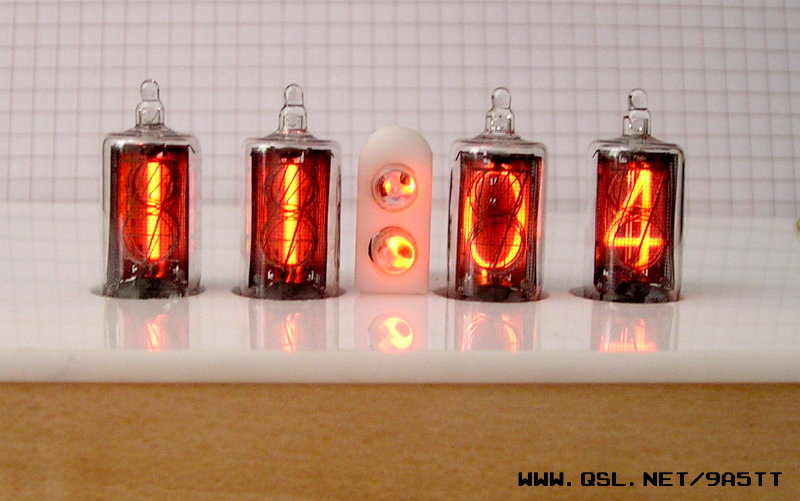 This one I
loved more. Neon holder (like the top cover) is made from white acrylic
(Plexiglas), 3mm thick. Frame is made from wood (thanks to my grandpa
who teached me how to love wood).
This one I
loved more. Neon holder (like the top cover) is made from white acrylic
(Plexiglas), 3mm thick. Frame is made from wood (thanks to my grandpa
who teached me how to love wood).
![]() Overall dimensions
were dictated by euro-board size (100*160mm). Frame could be smaller...
but it's left for another version.
Overall dimensions
were dictated by euro-board size (100*160mm). Frame could be smaller...
but it's left for another version.
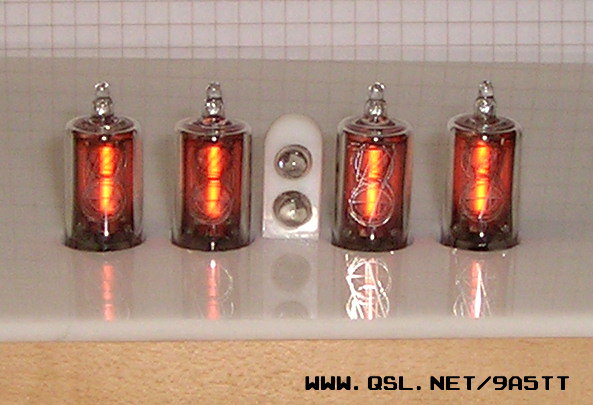 Nothing wrong
with time displayed (it's not easy to capture neons lit sometimes).
Nothing wrong
with time displayed (it's not easy to capture neons lit sometimes).
 Side view
(this time with neons lit :-))
Side view
(this time with neons lit :-))
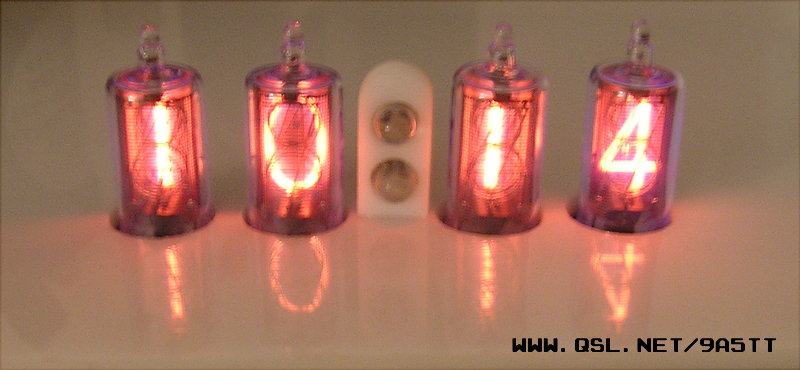 And one "night
view". 5853 tubes have this purple glow from mercury being added
during production. Beautiful.
And one "night
view". 5853 tubes have this purple glow from mercury being added
during production. Beautiful.
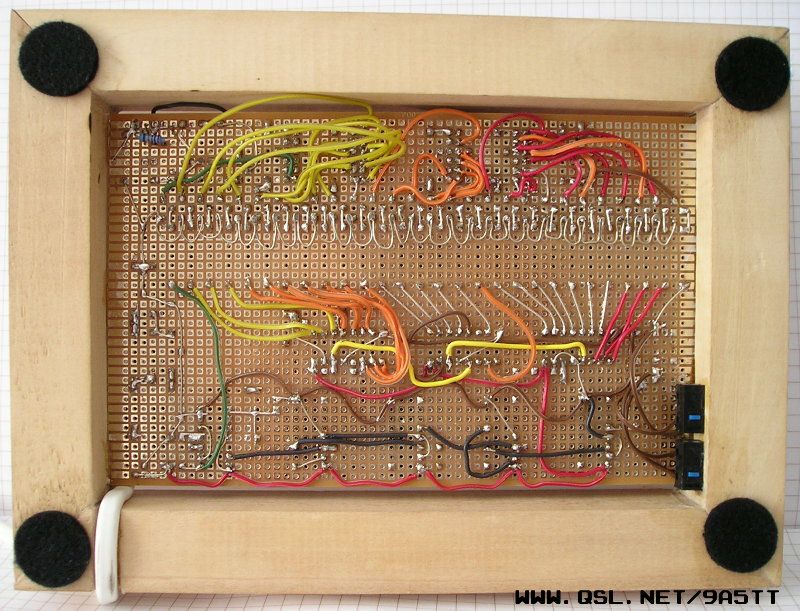 Electronics
part. The board could be only half of the size. Bottom right, there are
two pushbuttons for slow and fast time adjustment. They were saved from
my broken mouse (whole plastic body and mains rated. And free :-))
Electronics
part. The board could be only half of the size. Bottom right, there are
two pushbuttons for slow and fast time adjustment. They were saved from
my broken mouse (whole plastic body and mains rated. And free :-))
UPDATE: after few months these pushbuttons start to malfunction. Due to contacts bouncing, it was impossible to adjust the right time. I replaced them with a pair of Reed-relays. Actuating them with a little magnet works great.
Images (C) 2004 Tomislav Kordaso, 9A5TT